From sample list to plate layout in one click
You have 12 samples, 3 assays, triplicates, and 30 minutes before you have to start your lab work. Do you sketch the layout on paper? Copy last week's Excel template and hope the columns still match? Wing it and sort out the annotation later?
I have seen both ends of the spectrum. Some researchers take shortcuts to save time, accepting that downstream traceability suffers. Others invest the effort to get proper annotation, knowing it pays off in analysis but resenting the time it takes. Neither is a good trade-off.
We built something better.
Annotate once, use everywhere
The first part of the solution is integration. In Clarida, your qPCR plate layout is not an isolated spreadsheet. It feeds directly into lab execution. The same layout that defines your wells also generates step-by-step pipetting instructions and later carries through to properly annotated analyses.
You define your annotation once. Clarida uses it everywhere it matters.
Auto · one click, done
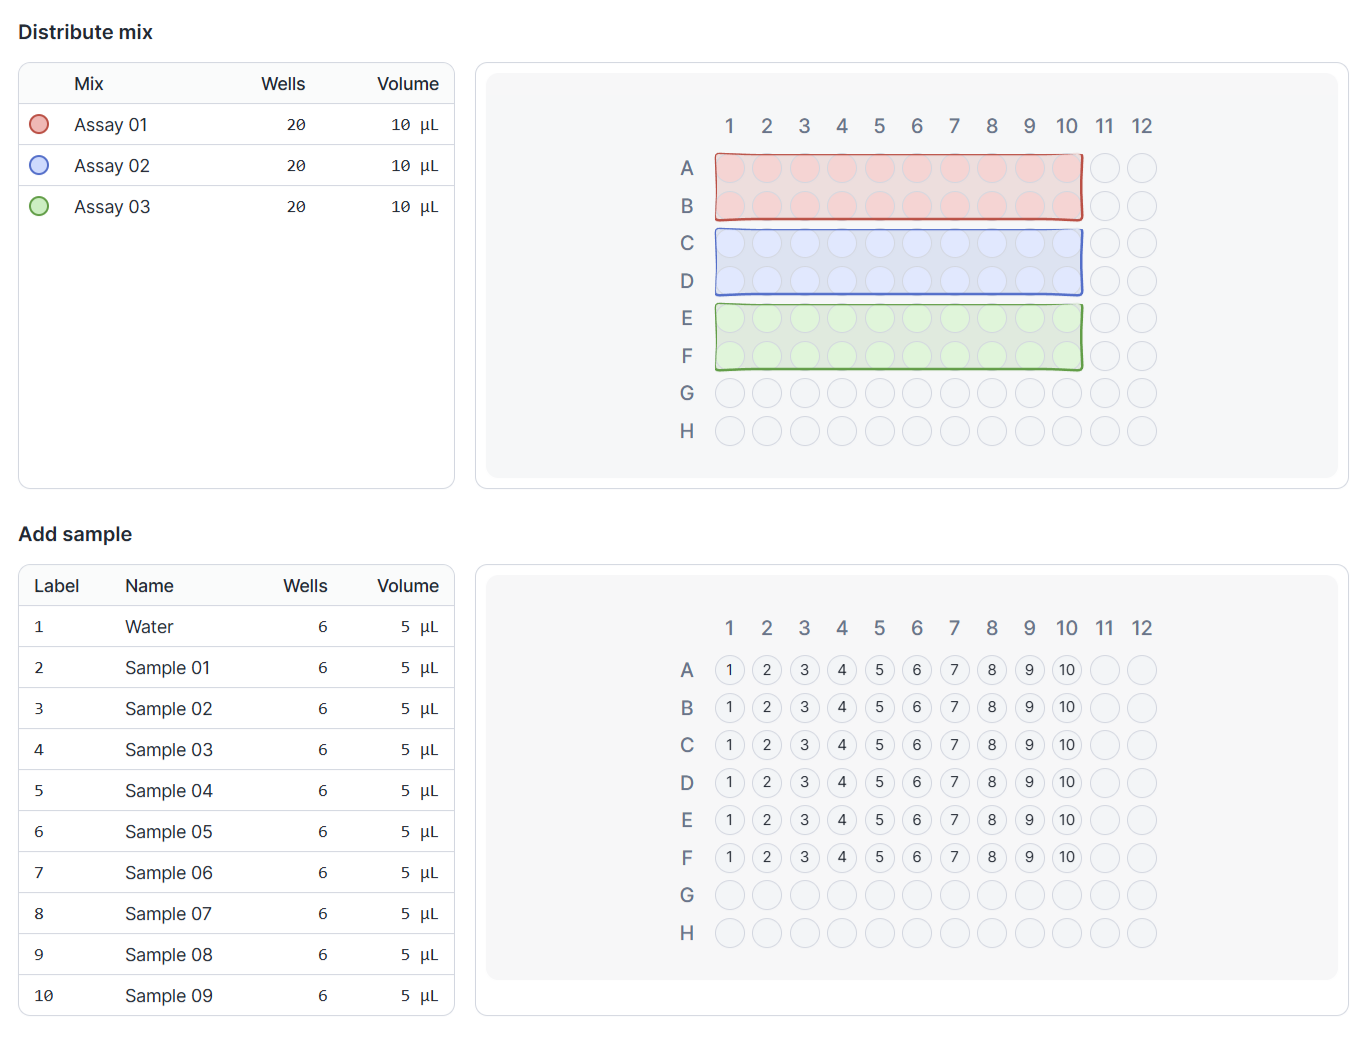
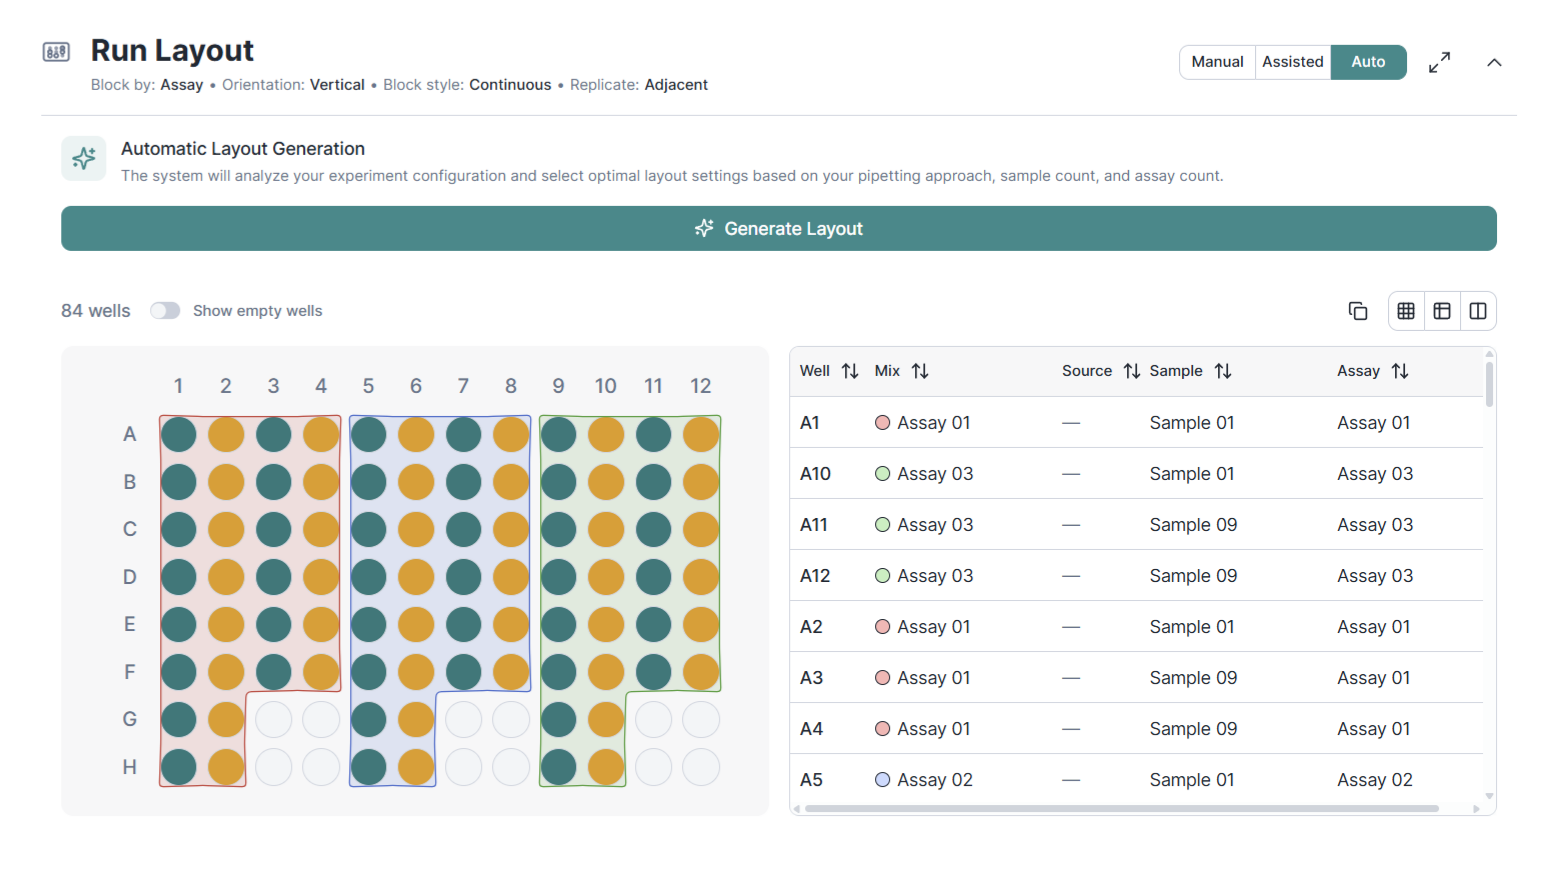
List your samples and assays, set your replicates and plate format (96-well, 384-well, or others), and click generate. Clarida produces a layout based on sensible defaults: grouping aligned with your mix configuration, vertical block orientation and adjacent replicates. For most routine experiments, this is all you need.
Assisted · your preferences, our algorithm
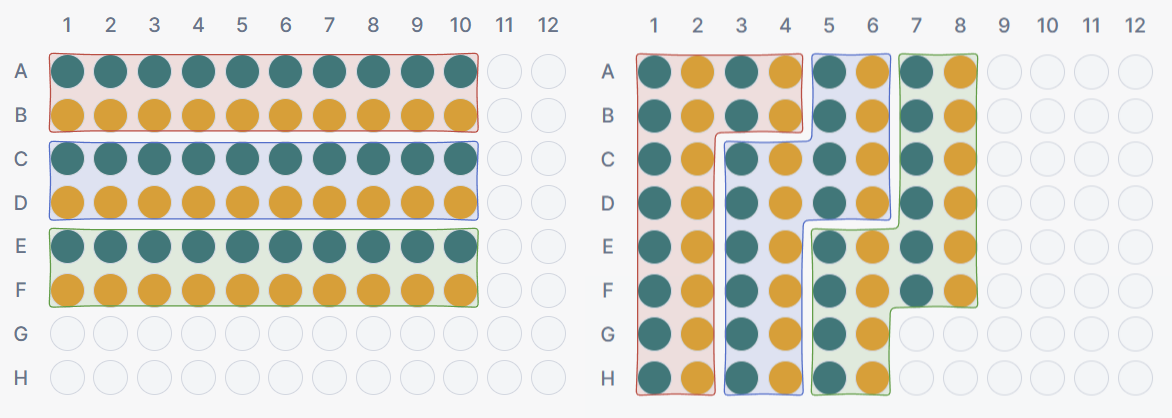
When the defaults don't match your lab's workflow, Assisted mode lets you adjust four layout settings: grouping, block orientation, block style, and replicate placement. Clarida still handles all the well assignment. You stay in control of the structure without manually touching individual wells.
The settings are designed around real pipetting decisions: how your multi-channel pipet moves across the plate, whether you prefer tight rectangular blocks or gap-free continuous filling, and how replicates sit relative to each other.
Manual · full control when you need it
Some experiments require exact well placement that no algorithm can anticipate. Manual mode gives you direct control over every well assignment. No generation, no constraints. You decide.
One less thing to worry about
Proper plate annotation matters for reproducible science, but it should not cost you an hour per experiment. Whether you use the plate layout generator in Auto for routine runs or fine-tune with Assisted mode, the annotation is done in seconds and carries through your entire workflow.
Key takeaways
- Plate annotation feeds directly into pipetting instructions and analysis - define it once, Clarida uses it everywhere.
- Auto mode generates a sensible layout in one click based on your mix configuration.
- Assisted mode gives you four settings to match your lab's pipetting workflow - no manual well-by-well assignment needed.
- Manual mode is always available when your experiment needs exact placement no algorithm can anticipate.
- The four settings - block grouping, orientation, style, and replicate placement - capture the decisions that actually matter for your workflow.
Jan Hellemans
Co-founder, Clarida
Creator of the qbase algorithm, co-author of the MIQE guidelines, and co-founder of Biogazelle (acquired 2022). Translated qbase+ into a globally adopted qPCR analysis platform serving pharma, biotech, and academic labs worldwide.